I was looking for an alternative network emulator to study for my CCNP ROUTE v2. The EVE-NG (a.k.a. UNetLab) caught my attention since it's free, easy to use and supports a wide range of images and platforms. I've downloaded and installed the EVE Community Edition.ova and VMware Workstation 14.
Just follow the installation wizard for VMware Workstation.

Leave the Enhanced Keyboard Driver unchecked and click Next.

Choose the default Use VMware Workstation 14 Player for free for non-commercial use and click Next.

Click Open a Virtual Machine > choose the EVE Community Edition.ova file > click Import.

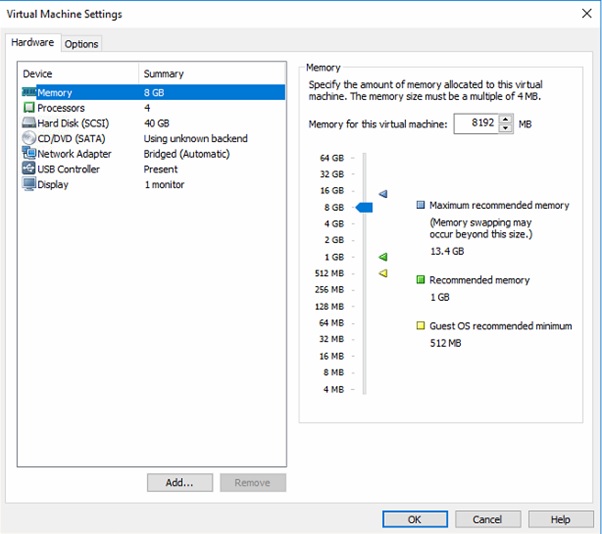
Click Edit Virtual Machine Settings.

The VM settings will adjust according to your machine's specs. I just left the default settings of 8 GB RAM and 40 GB HD space.


Under Network Adapter > choose NAT.

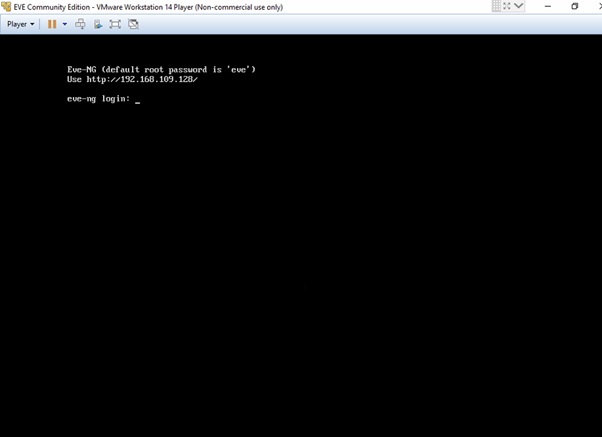
Login by typing root / eve on command the prompt.

Type the root password (twice to confirm).

Optionally edit the hostname.

Optionally edit the domain name.

Optionally choose DHCP or Static IP address. It should be the same range used on your machine's VMNet adapter.

Optionally type an NTP server.

Choose direct connection.

The EVE NG installation will take several minutes to finish.

Once installation is complete, login again using root / eve (or to the changed password). Issue a ping 8.8.8.8 to verify Internet connectivity. The Internet connection is needed to perform updates on the EVE NG Linux package.

Issue an apt-get update and apt-upgrade commands. The upgrade will take several minutes to finish.


Open a PuTTY and SSH to the EVE NG IP address.

You'll need to generate a license key in order to run Dynamips IOS. Copy/paste these commands and take note of the license key string.


Once the license key is generated, type these commands:

Download and install FileZilla (or WinSCP).

Type the EVE NG IP, username/password (root / eve), port number is optional and click Quickconnect (or just hit Enter).

On the Remote site either browse or just type the directory below. Drag and drop the IOS image from your machine's folder or directory on the left to EVE NG directory on the right.
/opt/unetlab/addons/dynamips
 Type these commands to verify and unzip the .bin file. You can only run Dynamips .image files.
cd /opt/unetlab/addons/dynamips // GO TO DYNAMIPS DIRECTORY
ls // LIST FILES

Open a web browser (I used FireFox Mozilla) and login using admin / eve

Click Add new lab (page icon).

Type the necessary info and click Save.

To add a node, click the plus symbol (+) or right-click then choose Add Node.

Under the Template, choose Cisco IOS 7200VXR (Dynamips). The only available options will be in blue text.

Optionally edit the node's NVRAM, RAM and Slot settings (Ethernet or Serial interface modules).


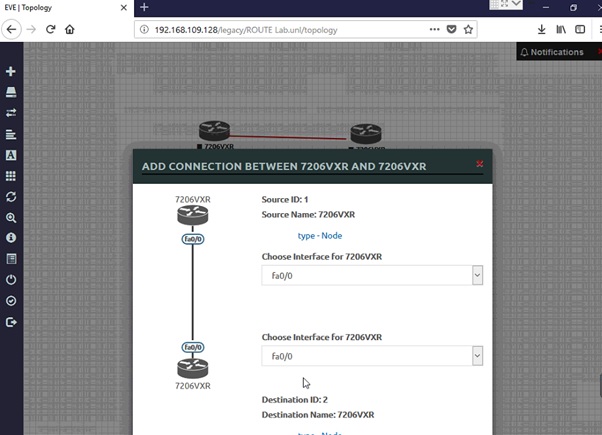
Click and hold the node and drag the connector (plug icon) to the adjacent node. Choose the source and destination interface to be used.

Right-click on a node and choose Start.


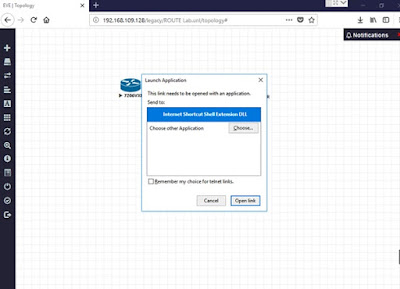
Double-click on a node to launch a console session (PuTTy). Choose Open link.

Just follow the installation wizard for VMware Workstation.

Leave the Enhanced Keyboard Driver unchecked and click Next.

Choose the default Use VMware Workstation 14 Player for free for non-commercial use and click Next.

Click Open a Virtual Machine > choose the EVE Community Edition.ova file > click Import.

Click Edit Virtual Machine Settings.

The VM settings will adjust according to your machine's specs. I just left the default settings of 8 GB RAM and 40 GB HD space.

Under Network Adapter > choose NAT.

Login by typing root / eve on command the prompt.
Type the root password (twice to confirm).

Optionally edit the hostname.

Optionally edit the domain name.

Optionally choose DHCP or Static IP address. It should be the same range used on your machine's VMNet adapter.

Optionally type an NTP server.

Choose direct connection.

The EVE NG installation will take several minutes to finish.

Once installation is complete, login again using root / eve (or to the changed password). Issue a ping 8.8.8.8 to verify Internet connectivity. The Internet connection is needed to perform updates on the EVE NG Linux package.

Issue an apt-get update and apt-upgrade commands. The upgrade will take several minutes to finish.


Open a PuTTY and SSH to the EVE NG IP address.

You'll need to generate a license key in order to run Dynamips IOS. Copy/paste these commands and take note of the license key string.
wget https://gist.githubusercontent.com/paalfe/8edd82f780c650ae2b4a/raw/bd7b6b8a81c338359e6de4ff0ed0def9f7dc9146/CiscoKeyGen.py
chmod +x CiscoKeyGen.py
./CiscoKeyGen.py

Once the license key is generated, type these commands:
echo [license] > /opt/unetlab/addons/iol/bin/iourc
echo "neve-ng = <LICENSE>;" >> /opt/unetlab/addons/iol/bin/iourc
cat
/opt/unetlab/addons/iol/bin/iourc     //VERIFICATION COMMAND
Download and install FileZilla (or WinSCP).

Type the EVE NG IP, username/password (root / eve), port number is optional and click Quickconnect (or just hit Enter).

On the Remote site either browse or just type the directory below. Drag and drop the IOS image from your machine's folder or directory on the left to EVE NG directory on the right.
/opt/unetlab/addons/dynamips

cd /opt/unetlab/addons/dynamips // GO TO DYNAMIPS DIRECTORY
ls // LIST FILES
unzip c7200-adventerprisek9-mz.152-4.S6.bin // UNZIP THE .bin FILE
mv C7200-AD.BIN c7200-adventerprisek9-mz.152-4.S6.image // RENAME THE FILE USING THE MOVE OR mv COMMAND

Open a web browser (I used FireFox Mozilla) and login using admin / eve

Click Add new lab (page icon).

Type the necessary info and click Save.

To add a node, click the plus symbol (+) or right-click then choose Add Node.

Under the Template, choose Cisco IOS 7200VXR (Dynamips). The only available options will be in blue text.

Optionally edit the node's NVRAM, RAM and Slot settings (Ethernet or Serial interface modules).


Click and hold the node and drag the connector (plug icon) to the adjacent node. Choose the source and destination interface to be used.
Right-click on a node and choose Start.


Double-click on a node to launch a console session (PuTTy). Choose Open link.

