If you're a member of APNIC just like me, you can attend their free training and download PDF handouts on various networking topics like BGP, IPv6, DNS, etc.
You can download the CSR1000v ISO in Cisco.com website (CCO login and privilege are needed). I created first a Linux 64-bit virtual machine in VirtualBox.
I gave the VM a 2 GB (2048 MB) RAM.
I gave the VM an 8 GB HD space.
I limited the HD space with only 8 GB space.
Type a Name for the VM.
Power on to bootup the VM.
Open GNS3 and go to Edit > Preferences > VirtualBox VMs > New
Close and re-open GNS3 drag the CSR1000V node (you can optionally change the icon) > right-click > Start.
Notice it opened the aux port and displays diag prompt.
You'll need to activate the eval license on the CSR1000v in order to configure advance features. Save and reboot the router in order for the license to take effect.
Issue the platform console serial command in order for the console connection to work in GNS3.
I ended up running a Cisco 7200 router instead with IOS 15.3 in GNS3. The Cisco 7200 router can support serial connections compared to a CSR1000v which is limited to Ethernet (Gig E).
You can download the CSR1000v ISO in Cisco.com website (CCO login and privilege are needed). I created first a Linux 64-bit virtual machine in VirtualBox.
I gave the VM a 2 GB (2048 MB) RAM.
I gave the VM an 8 GB HD space.
I limited the HD space with only 8 GB space.
Type a Name for the VM.
Go Settings > Storage > Empty > Choose Virtual Optical
Disk File > choose the CSR1000V OVA file > OK.
Power on to bootup the VM.
Open GNS3 and go to Edit > Preferences > VirtualBox VMs > New
GNS3 will auto detect/add the created VM (CSR1000V) then click
‘Use as a linked base VM (experimental) > click Finish > Apply > OK.
To edit VM settings in GNS3, go to Edit > Preferences > VirtualBox VMs > CSR1000V >
Edit
Under General settings > tick Enable remote console.
Power off the VirtualBox VM (CSR1000V) by doing a right-click >
Close > Power Off.
Close and re-open GNS3 drag the CSR1000V node (you can optionally change the icon) > right-click > Start.
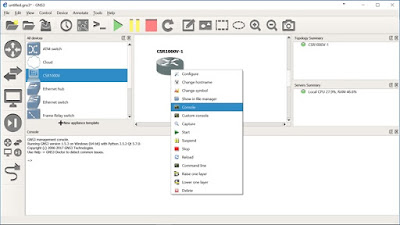
Right-click on the node > choose Console
Notice it opened the aux port and displays diag prompt.
You'll need to activate the eval license on the CSR1000v in order to configure advance features. Save and reboot the router in order for the license to take effect.
Issue the platform console serial command in order for the console connection to work in GNS3.
I ended up running a Cisco 7200 router instead with IOS 15.3 in GNS3. The Cisco 7200 router can support serial connections compared to a CSR1000v which is limited to Ethernet (Gig E).


No comments:
Post a Comment